Blog

Project Reveal : A Luxurious Kitchen Renovation in South Barrington

In the realm of high-end full-service interior design, I recently completed a project that showcased my expertise in total transformations. My clients, wanting to stay local, were drawn to my firm's full-service capabilities, encompassing material selections, skilled trades, and the ability to execute a substantial renovation.

My Process & Project Launch

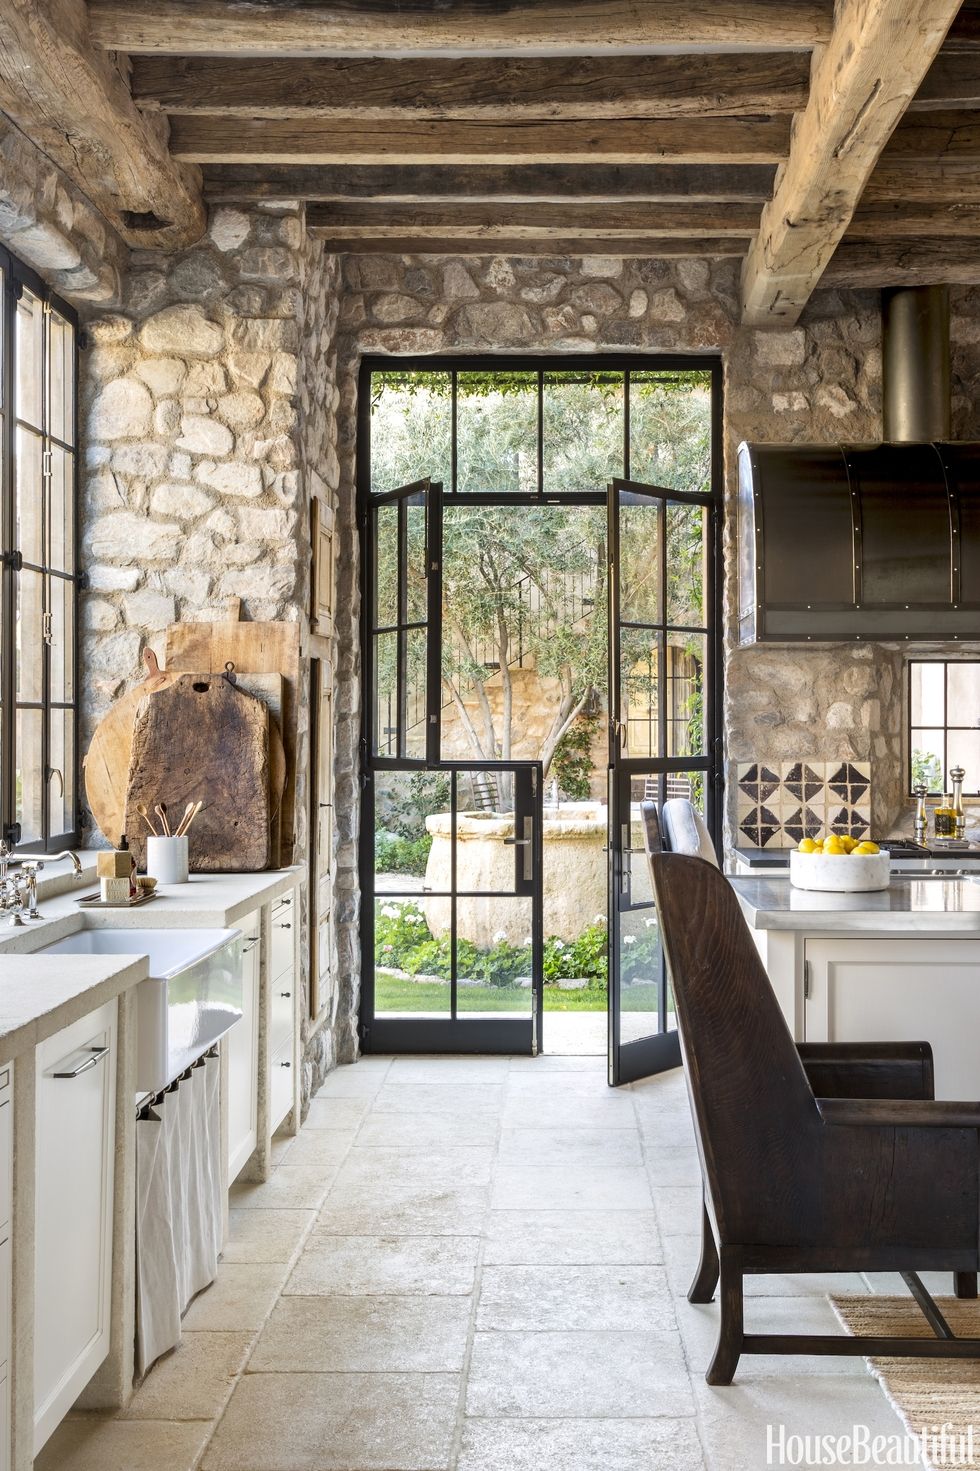
Prior to the renovation, this home had an unexpected fire and needed to be designed from the ground up and completely taken down to the studs. Once opening the walls, we had an unexpected opportunity in the Kitchen to remove their outdated soffits, open up the space and borrow square footage from their existing Mudroom. This is a perfect example of what I mean when I say, “Trust the process.” Large-scale renovations hardly ever proceed without a few surprises, and I actually plan for the unexpected during the design planning phase.

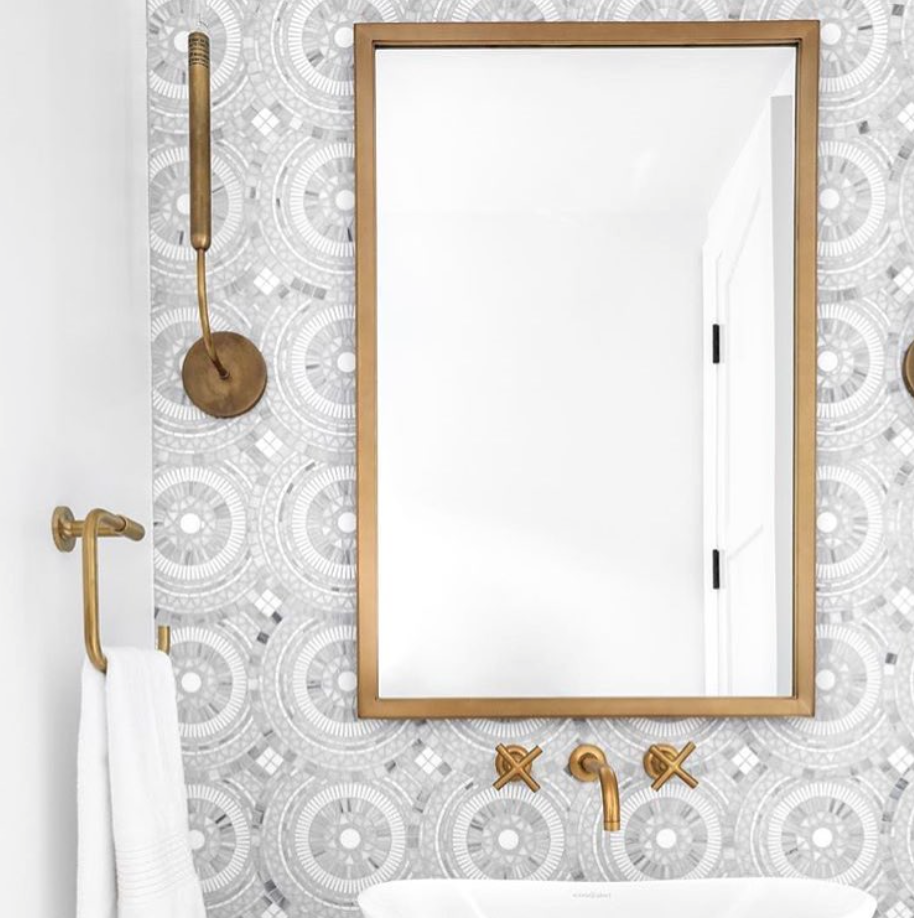
The contractor and I were able to help our clients navigate the unexpected surprise. Utilizing the new space, I designed a gorgeous Evening Bar including a beverage center, featuring alabaster sconces, marble tiles, undercounter refrigerators and a picturesque window setting, which became an elegant retreat for their family.

Renovation Revealed

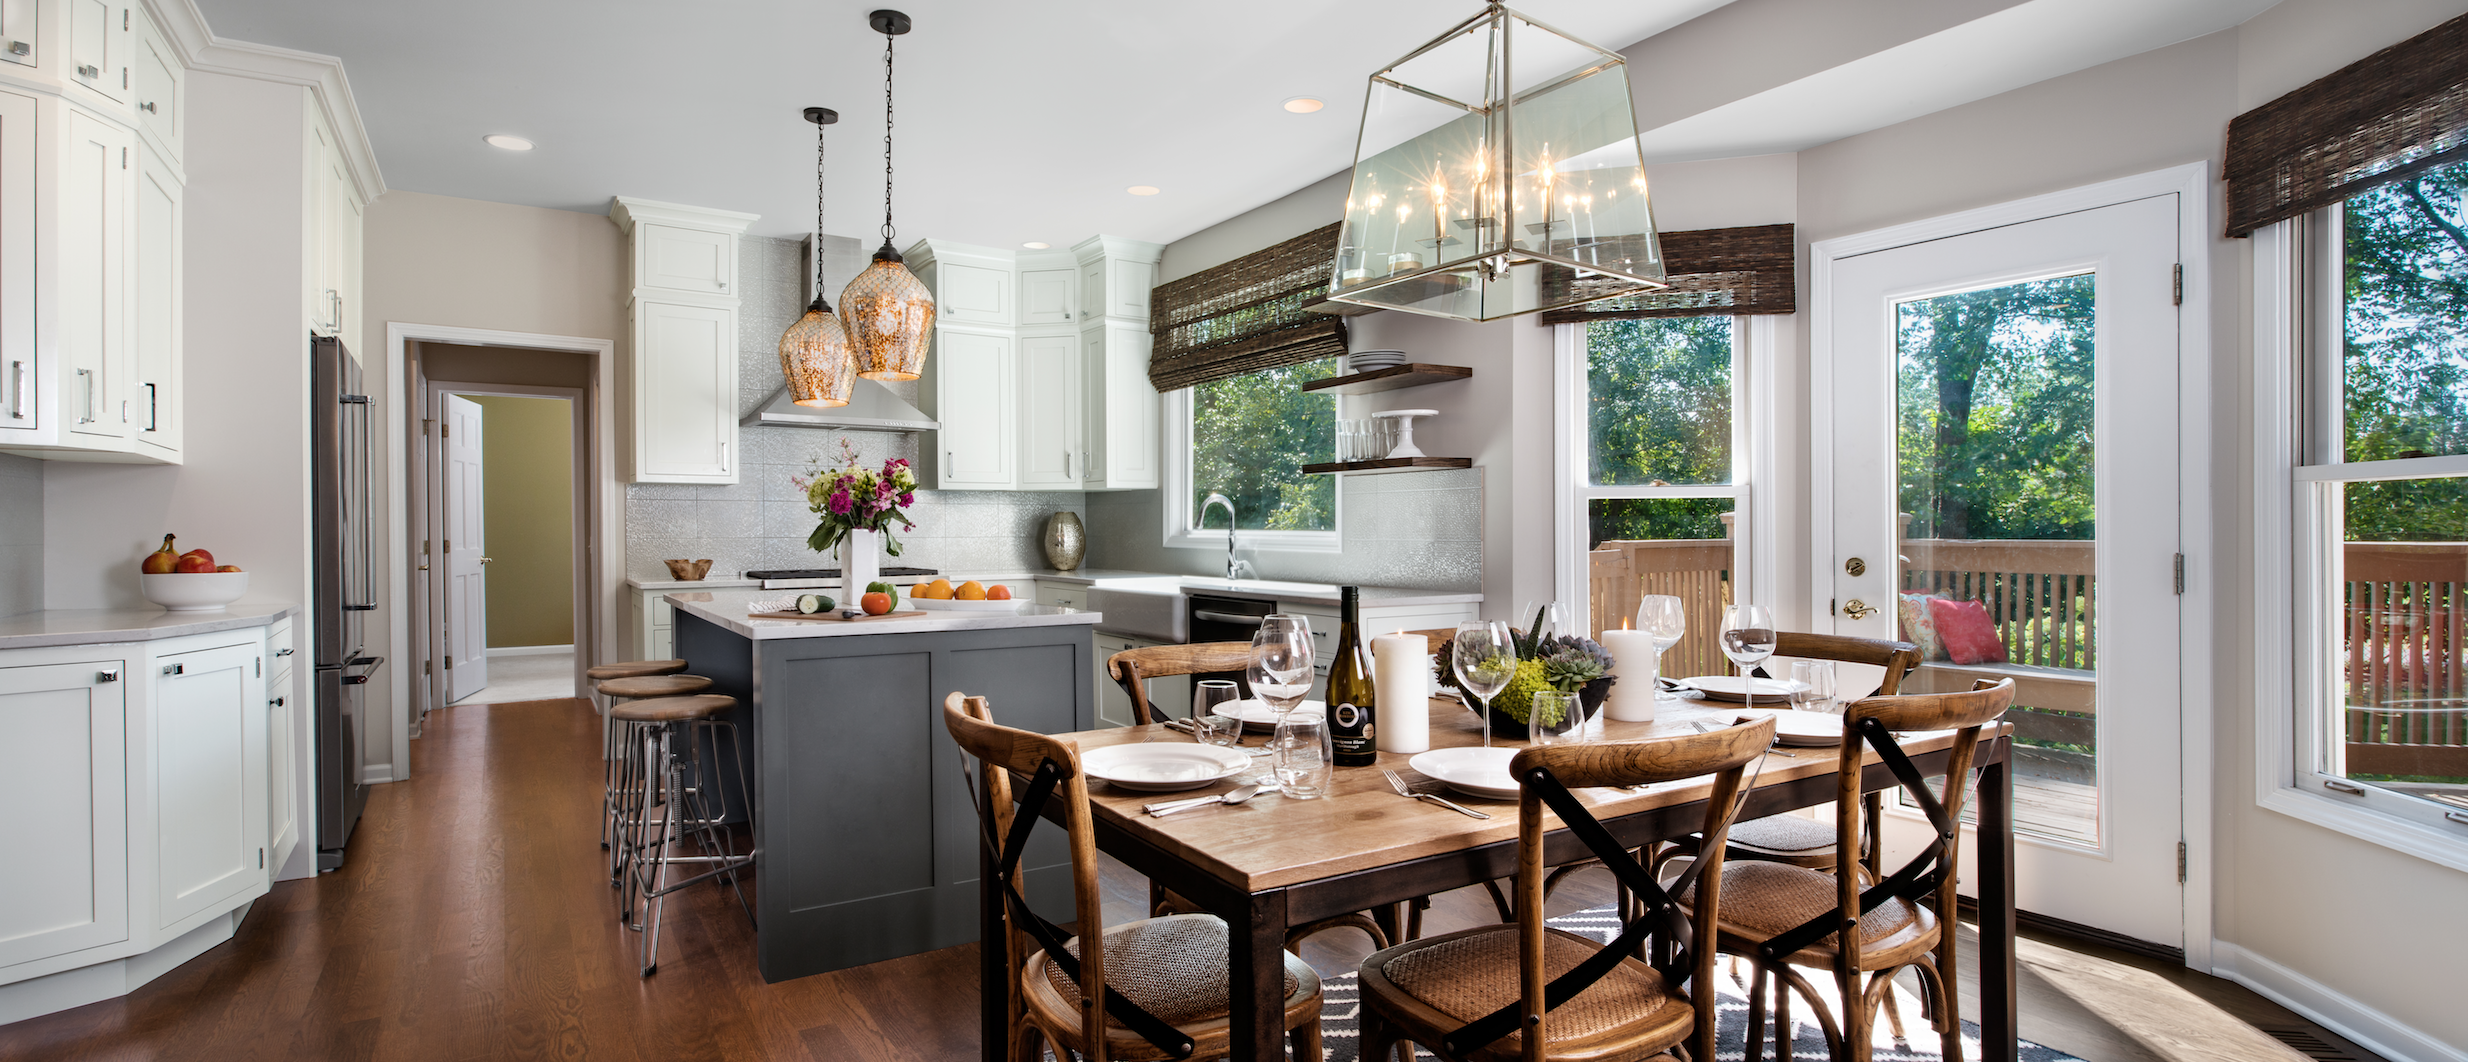
My clients had an area in their mudroom that they rarely used (pretty common) or just got cluttered up and we turned it into useful space. A home beverage station not only houses their favorite cocktails and coffee but will be an instant hit with their guests at any gathering. Now that's what I call holiday entertaining made easy!

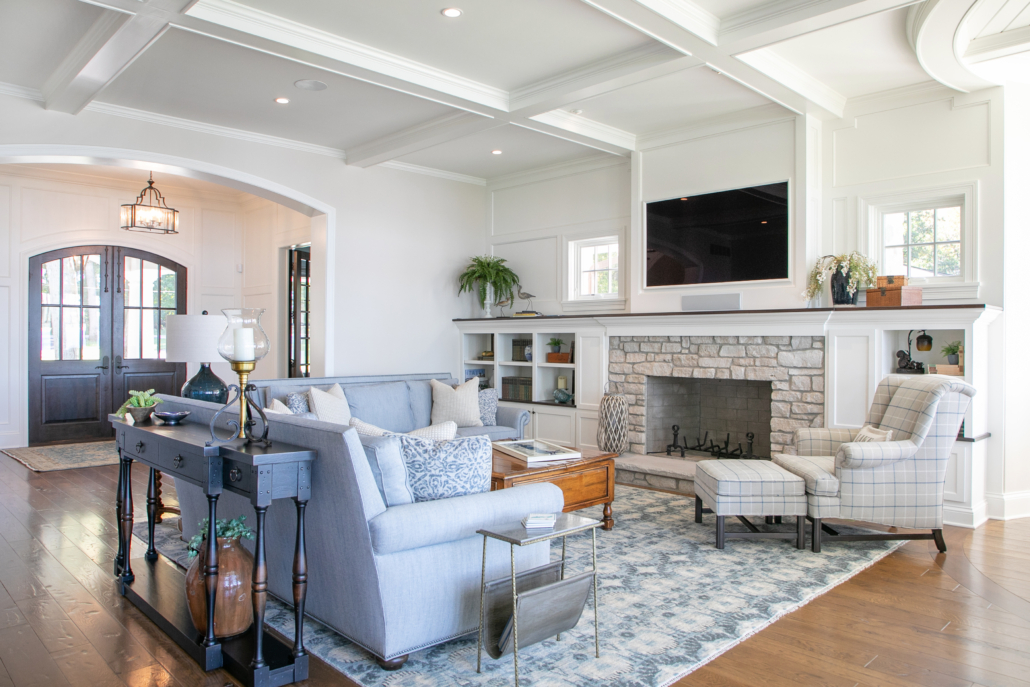
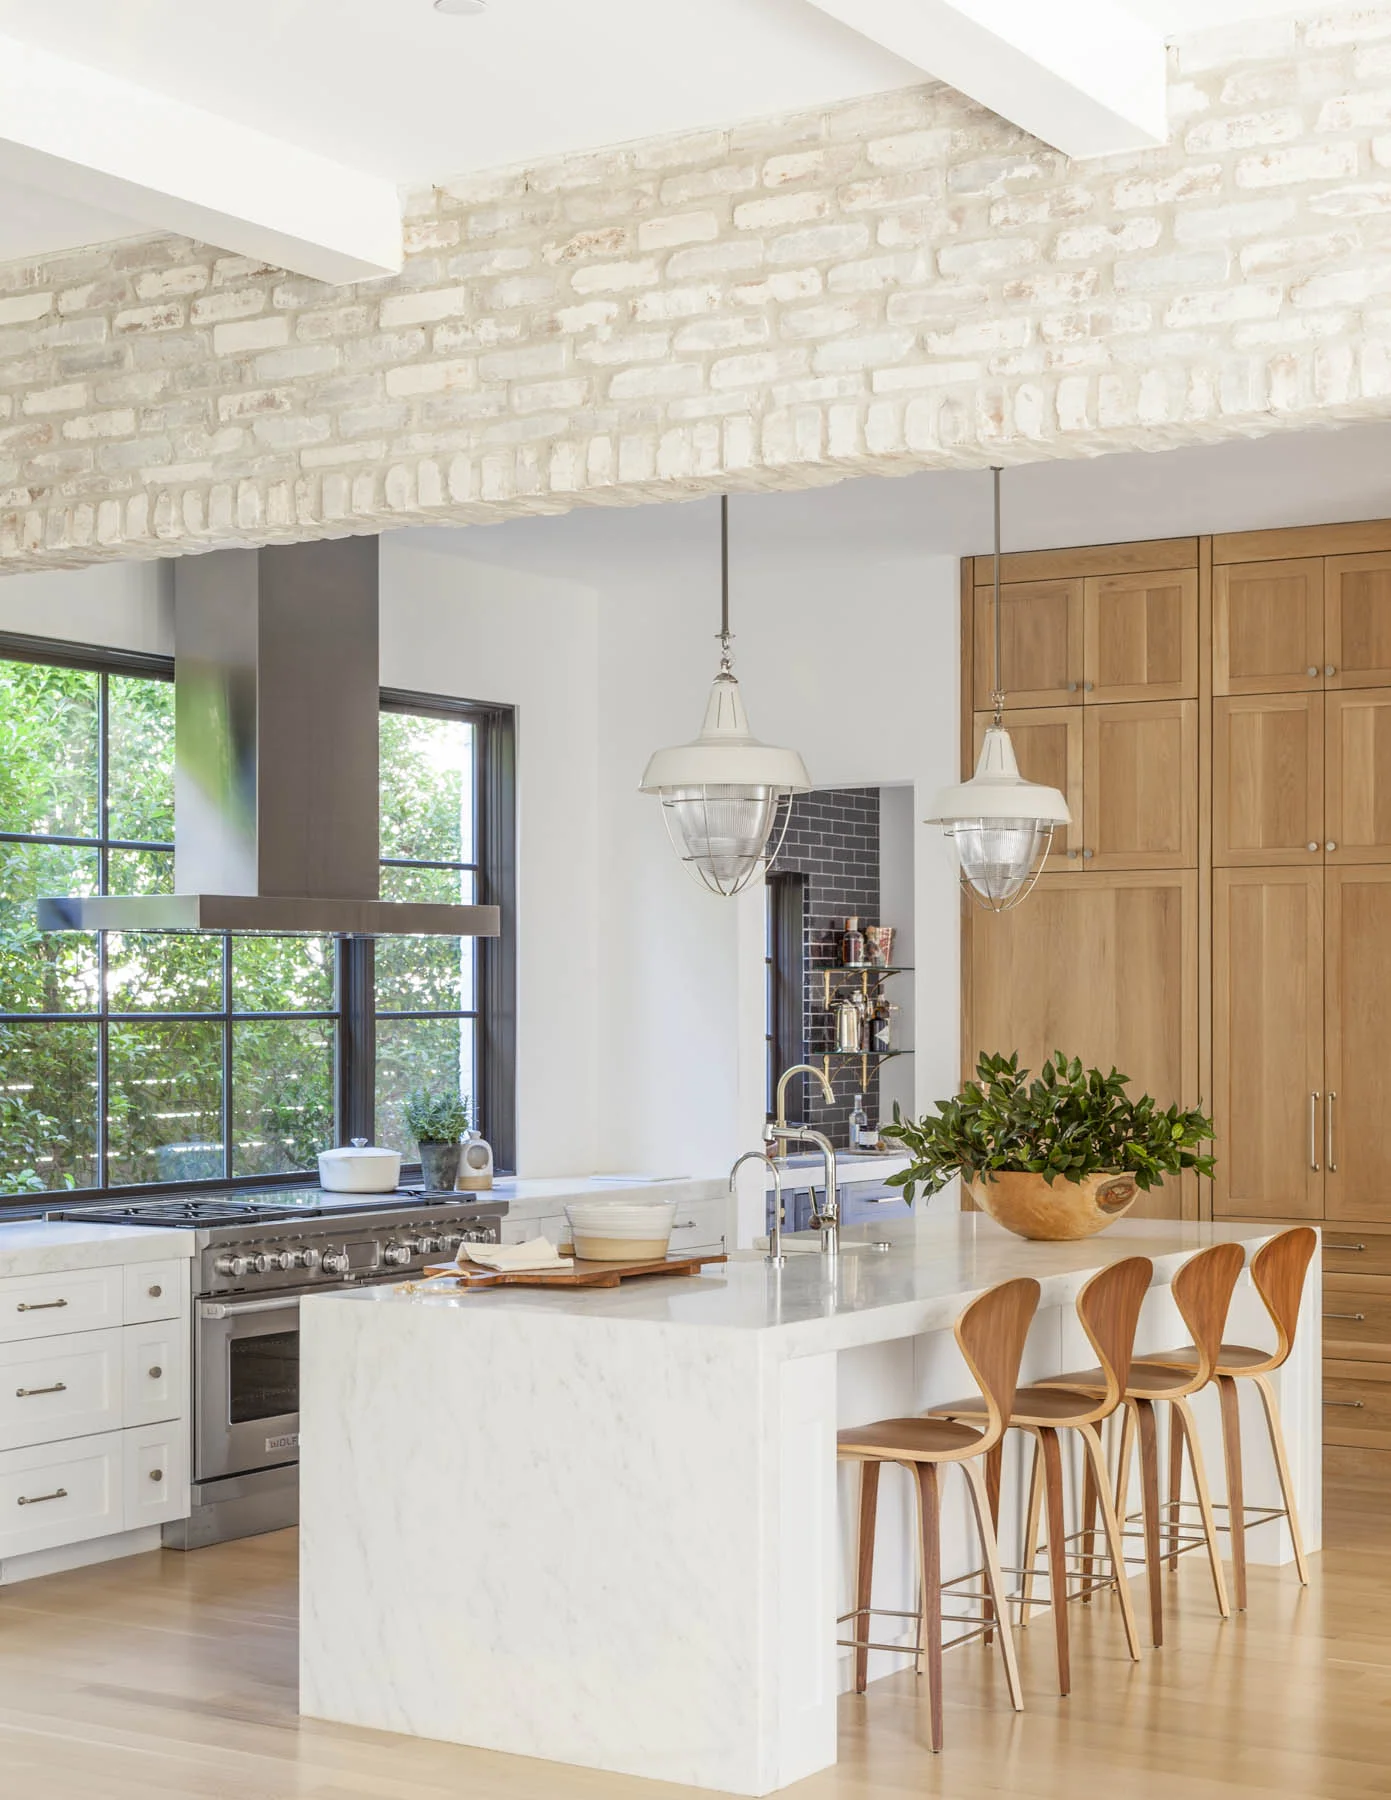
New paint, tile, cabinetry, lighting, and amazing layout…the transformation in this home was HUGE. I really reimagined the space for my clients, having listened to their needs, what they liked, and how they wanted their new space to feel and function.

What's Next?

This project is a prime example of the level of support you can expect when you partner with an experienced full-service design firm. Hiccups and unexpected challenges come with the territory - often you don’t know exactly what you are going to find when you start renovating a home. Our team was able to seamlessly navigate challenges to orchestrate a total home transformation.

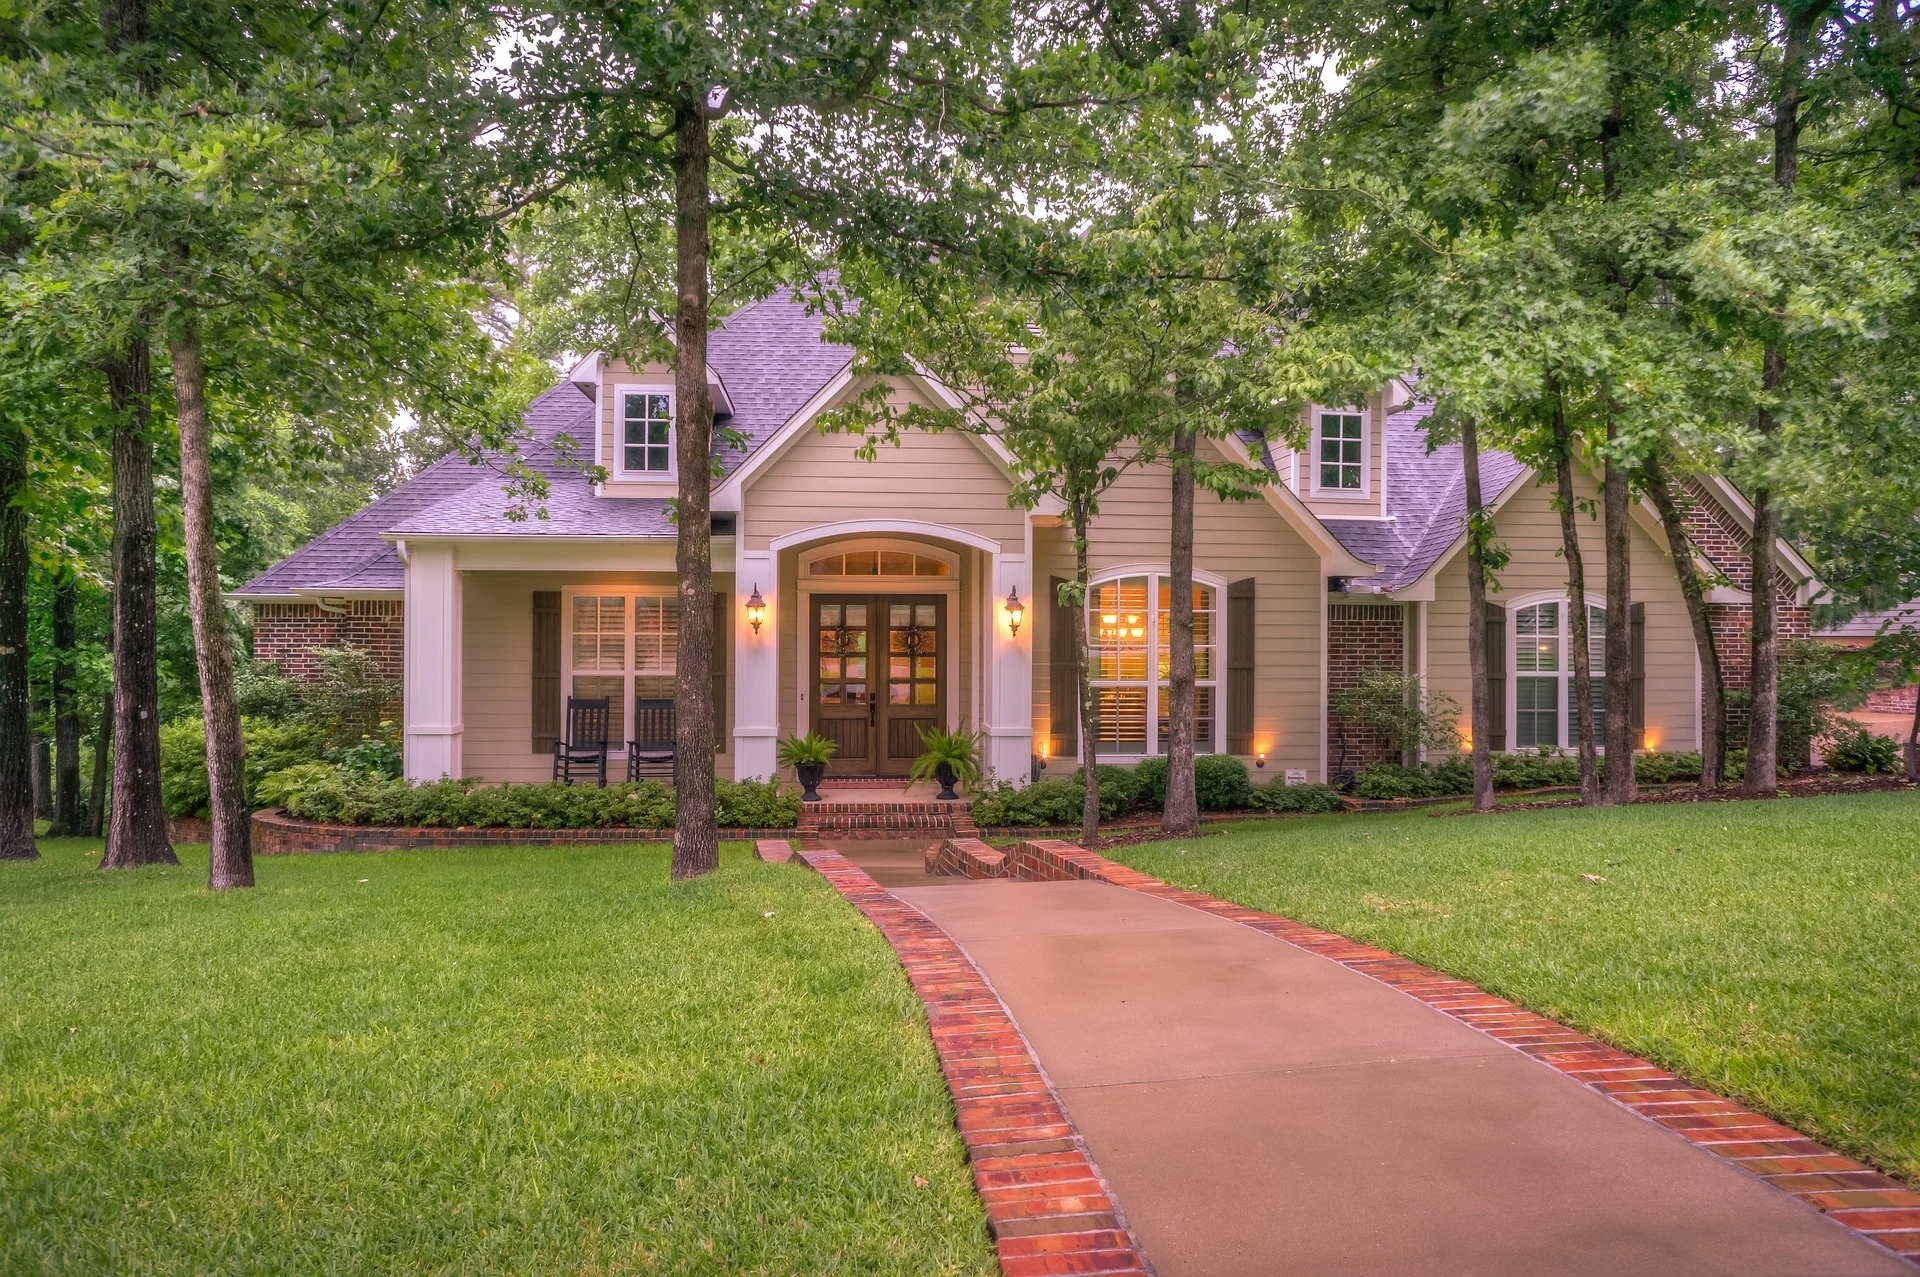
Are you building a new construction home or renovating? Let’s talk soon! Our project kickoffs are booking quickly - it all starts with a Discovery Call.

Michelle Ramaker
3 Tips for Home Organization that Makes Hosting Easy

Most of us can feel it when we’re in one, yet can find it difficult to identify the specific elements that make a home great for entertaining. What gives a space its warm, inviting ambiance? Is it the lighting? The size of the space? The availability and arrangement of seating?

To get to the bottom of what makes a space ideal for hosting, I am sharing my insights with you! Whether tackling a dining room, kitchen, living room or outdoor space, here is what I discovered about creating a space that begs to be filled with guests.

Tip #1: When Furnishing Your Space, Select Multi-Functional Storage Items

Flexibility is the single biggest change in design in the last 20 years. Homes need to be designed to accommodate a large party, a small intimate gathering and sometimes just two people. Formal dining rooms have become less popular in recent decades, as homeowners instead opt to create an expanded take on a breakfast nook within their kitchens. It is so important to have ample space to store items used for entertaining, such as platters and serving ware—either in a separate room like a butler’s pantry or within a sideboard. Nothing can put a hitch in plans to entertain like an overwhelming sense of clutter, and that’s where having the right kind of storage throughout your house can help.

Tip #2: When Arranging Your Room, Make Multiple Seating Plans

Sometimes I am foregoing a formal dining space and making the breakfast room into a sunroom with an eating area. It often has the prettiest view and is best suited for people who entertain casually. By putting out the fancy china and fine linens, this space converts to a dramatic, gorgeous dining space that often can seat many more than a dining room!

In my own kitchen and breakfast room, I have a fireplace, soft seating and great views from a big window that provides lots of natural light. It all relates to the idea of an open plan—having your space include more than just the kitchen and cabinets.

It is my mission to get my clients to use all the rooms of their home—from living rooms and dining rooms to studies—by making them inviting and multi-functional. A kitchen is no longer just for cooking; it’s also for socializing, entertaining and spending time with family!

Tip #3: When Decorating Your Home, Add Thoughtful Seasonal Accessories

Layering is also important when it comes to the design details of a space. It’s all about layering to make it inviting. Mixing soft fabrics with leathers, adding mirrors and metals, and finding the right mix of all that. Layering draws people in and makes them feel comfortable and invited.

Music is another way to bring energy to a party and to tie several different spaces together, I recommend investing in a sound system that connects rooms inside and outside.

Looking for more smart design tips you can use this holiday season (and beyond)? Subscribe to my exclusive monthly newsletter HERE!

Cheers!

Michelle

Michelle Ramaker
How Long Does It Take to Design & Build a Custom Home?

Your custom home build timeline is one of the most uncertain characteristics of a project but it's super important to establish a concise schedule with your builder and designer. Having realistic expectations and being flexible to any potential delays.

In this blog post, I will be giving you some helpful tips for timeline estimates to be used as a guideline. Please work with your builder to come up with a detailed plan for your new construction project.

Phase 1: Planning

During the planning phase of your project, you want to have a detailed plan and design aesthetic before you break ground, to avoid any costly mistakes in the field. Pull together your inspiration boards on your favorite design websites and hire your favorite interior designer to come up with a awesome concept for your new home! Think about your location. Do you want to be in the city? Do you want to be on a large lot in the country? How much space would you like?

How Long It Can Take: The planning phase should be about 2-3 months. This is the time to dive into the layout and design of your new home with your builder. During this time you will also be finalizing your design aesthetic. What are you gravitating towards? A light, bright interior or something more moody and dark?

Phase 2: Procurement

Before your home build begins, you want to order the major materials. For example, on our hillside farmhouse build, we ordered the doors and windows first, as they had a lengthy lead time. Meet with your electrician and plumber on site to layout the mechanicals and begin to think about pre-wiring for any audio/video components you may want to include. Involve your designer who will lead you through this process and avoid any costly delays.

kitchen design


How Long It Can Take: This part of the build process will take about 1-2 months. Clear your calendar friends, this is when the fun begins! You will be meeting with each supplier to make selections to form a solid design direction for your new home. Prepare yourself for decision fatigue by hiring a designer. Honestly, we speak the builders language. We can help you get the look you want while moving your project forward and on budget so that you can focus on making the important decisions that will impact the overall outcome of your project.

Phase 3: Construction

Finally you broke ground! Woohoo! Things are starting to take shape and you can start to see your new home coming to life. The foundation will be poured and your farming will soon begin. I suggest visiting your new home on a weekly basis to meet with your builder. As a designer, I am on site reviewing the design, timeline and budget every Friday with the team to assure we are on track and moving forward in a timely manner.

interior design


How Long It Can Take: The construction for your new build should take about 9-12 months, depending on your project. You want to make sure that you are staying ahead of your builder and making selections and decisions according to the timeline. I have a specification binder that is my design bible! It literally goes with me everytime I head to the property. I also give a copy to the builder to keep on site for the trades to reference at a moments notice.

Phase 4: Installation

Towards the end of construction, the final installation phase begins. This is when your interior starts to really take shape. Lighting fixtures are delivered and installed. The beautiful plumbing trims, custom cabinetry and countertops are on site. You can start envisioning your furniture in the space! You will be walking through the site with your builder and creating a final punch list of any outstanding items.


How Long It Can Take: The installation phase should last anywhere from 2-3 months. It should run smoothly as you have made all your selections and they are in your trusty selections binder. Its time to re-visit your original budget (again!) to stay on track.


What's Next?

Many clients are surprised by the amount of time a new construction project takes. A whole year is a huge time investment, not to mention you are practically married to your design team for the duration. But, it is so worth it! You will have a beautiful home that functions specifically for you and your family. Whether that is perfectly organized family spaces or quiet corners to relax with a hot cup of tea. You can grow into your new home over the years and make it your own by adding your own signature style!


If you're eager for more insight on how to create your dream home, check out my You Tube series: Hillside Farmhouse for more helpful tips.

See you soon!

~Michelle

How to Design a Beautiful Interior that Your Kids Won't Destroy
MichelleRamakerInteriors-Wheaton-affect-kid-pets-on-home.jpg

In today's homes, families work and play together in the same spaces. Children are the center of the home and every inch of space should be designed to accommodate wear and tear that goes along with family living. As a mom, I get it! I have overstuffed tupperware drawers and sippy cup spills on my sofa. I'm stressed with all the tidying with two young kids and the overwhelming clutter they bring!

But, this doesn't mean you have to sacrifice beauty for comfort. Family oriented and still chic? You CAN raise your family in style- and it's a lot easier than you may think! The options are endless, and in this post, you'll explore all the ways in which you can create a home that is sturdy and safe as it is beautiful. You'll learn to plan for both the short and long term, designing livable, efficient and yes, timeless rooms that will expand and adapt to your family's needs as they change over time.


Tip 1: Find Sturdy & Performance Fabrics

Now that you've decided to redo your home, the first step is outlining your goals. Whether you're planning a complete renovation or just some minor streamlining and beautifying, writing your ideas down will help you get organized. Start with a comprehensive wish list. Do a little research. What types of materials will stand up to heavy use in high traffic areas? I know which fabrics work and which don't. Think about utilizing outdoor fabrics, such as Sunbrella for your indoor spaces. These are easily cleaned and antimicrobial. I love adding a faux leather vinyl to bench seats in breakfast nooks and upholstered bar stools in the kitchen. These alternatives will give you the beautiful look without the worry.

MichelleRamakerInteriors+Wheaton+fabric+swatches+rug+pattern+options+kid+friendly+home.jpg


Tip 2: Embrace Colors, Patterns & Thick Textures

Don't underestimate the power of color, pattern and texture in hiding stains and dirt! Embrace pops of color and pattern. Go over your design plans with all the members of your family. Asking for help and ideas on patterns for rugs and pillows, blankets, and texture is a great way to get kids involved in a project! After all, everyone in the household should have a say!


Tip 3: Choose Weathered or Rustic Furnishings

You'll be surprised how slightly weathered or patina'd furnishings are great for high traffic areas. A slight texture can keep a piece from looking worn over the years and adds more character. I have a soft spot for a great weathered dining table that I don't have to worry about during my kids art projects.


Tip 4: Prioritize Easily Washable Finishes & Furnishings

Next, get inspired! Rip pages that you like out of magazines or put together a fabulous Pinterest board. Collect swatches of fabric that catch your eye or paint color chips that you're considering. Benjamin Moore offers their Aura line which is the best washable paint for playrooms and kids rooms. The two types of paint finishes that are easy maintenance are satin and eggshell. These two paints are used frequently in high-traffic areas, and they will provide a long-lasting, practical, and an attractive finish that is easy to wipe away marks and stains!


Tip 5: Use Rugs to Serve & Protect

There's a reason hotels and casinos use those hideously crazy designs - they hide stains! Although, you'll probably want something a little more pleasant on the eyes. But we can learn something from those busy carpets. Any solid dark or very light carpet is going to show dirt. It's better to have something with flecks or multiple colors to hide dirt. A very low level loop or plush will hide foot traffic well.

And when it comes to cleaning, man-made materials are easier to clean up - nylon and polyester. Wool is also stain resistant to spills and it repels oils. It’s a great natural option...but pricey.


MichelleRamakerInteriors-Wheaton-exterior-home-design-curb-appeal+landscaping+accent+window+trim+white+black.jpg

Tip 6: Invest in Quality Craftsmanship

Fur. Spills. Crumbs. Bouncing. These are the imminent dangers to your home when you have pets or kids, so you have to make sure your furniture can stand up to them. It's important to invest in sofas that have a sturdy build and are made of durable fabric—perfect for even the most chaotic households. A sturdy foundation will help the piece last years longer.

You can’t go wrong with microfiber or canvas. These materials are made to withstand all sorts of use, and are typically easy to clean and take care of. Also, you want to look for fabric that has a tight weave—chenille, velvet, and silk are no-gos, unless you get a special performance variety that is stronger than normal.


Tip 7: Invite the Kids to Help Create the Home

You'll be surprised at how much input children will want to add! Gather your family to discuss their needs and preferences so you can design a home that accommodates everyone. Invite the kiddos to help decorate your home (deciding between two adult options). It could be a fun family activity they'll appreciate later!

With this practical and inspirational guide, you can create a home that is both functional and beautiful. There's no need to sacrifice style while having a family. Designing a home with children in mind should be fun! By mixing the whimsical with the practical, you'll be able to create an environment in which your whole family feels comfortable. 

Need help designing a family-friendly space that you love and keeps the kids happy? Let's talk! Drop me an email and I will call you to chat about how I can help.


Cheers!

Michelle

Michelle Ramaker
How to Design a Gorgeous Outdoor Retreat
outdoor+patio+seating+lights+sofa+white+drapery+candles+romantic+oasis.png

A well designed outdoor space offers a retreat from an increasingly frenetic world. As we increasingly embrace holistic self-care while sheltering in place, I am designing outdoor living spaces that offer my clients a sanctuary of calm and wellness with every little space bringing them a moment of joy.

Those moments of joy can be translated into ivy spilling down the walls, impressively tall potted plants, a dining table lit by low-hanging rattan lights, and the faint scent of salt water and thyme in the air. It’s an atmosphere that invites you to stay and hang out for a little while—which was exactly the point. 

Would you like some help designing your outdoor space? I'm sharing my five easy steps to creating an outdoor space that I hope brings you moments of joy in your day!

Step 1: Imagine How You Would Love to Use the Space

Start by thinking of how you would like to use your outdoor space. Do you want to have your morning coffee as a couple outside? Are you looking forward to entertaining the family this summer with a relaxing bbq and yard games? Do you want to cozy up on a lounge chair with a good book and reflect on your day with a glass of wine? Now is the time to let your imagination run free and dream up a fabulous space! 

A great outdoor space can offer a fresh perspective on your day. Jump onto Pinterest for some inspiration or grab a pad of paper and take a few moments to jot down ideas of what you want your space to look like and feel like before moving onto the next step.

Step 2: Plan to Layer the Space from the Ground Up

There’s no rule book mandating what outdoor design should be. Let indoor comforts, like plush seating, side tables, and unexpected elements of art guide the way. It’s imaginative ideas like these that bring out your personality and add sass to your space!

michelleramakerinteriors+wheaton+white+pillow+wooden+table+seating+flowers+in+jar.png

Step 3: Consider Outdoor Furniture

If your patio is rather large, create separate moments within the space for talking, lounging, and dining. You can do communal seating at one large table to emphasize the length of the space. Another thing to consider is the wear and tear furniture can get outdoors. Think about investing in longer lasting materials such as teak and steel, which is designed to weather the elements.

Step 4: Embrace Outdoor Fabrics for Comfort

It is important to keep the palette neutral to let nature be the star of the show. Choose fabrics and textiles in earth tones, creams and whites, and cool greys (my favorite!) to allow the emerald plants to shine.

michelleramakerinteriors+wheaton.png

Step 5: Add Some Beautiful Final Touches

A wall of greenery is a statement. Add a wall of greenery with an inventive twist, like four mirrors that bounce light and reflect the view. This allows people who are sitting to capitalize on the views and your new lovely environment!

As the weather starts to improve and the flowers start to bloom this Spring, get out of the house by designing your own outdoor living space that is inviting and peaceful.

The great advice doesn't stop here! Get more beautiful and impactful tips sent to your inbox monthly by signing up for my newsletter.

Cheers to a great summer!

Michelle

Michelle Ramaker
Stuck at Home? Here's How to Plan Your Dream Space
master+bathroom+inspiration+double+vanity+brass+hardware+marble+tiles-2.png

Spending more time working from home the next few weeks? With our current situation, more people are staying at home and stocking up on essentials. I find myself having more down time and a heightened awareness of my home. In the last week, it has become apparent what is working well and what I need to purge. Spring cleaning is in full effect! 

Most of you know, my design studio is in my home. I planned it this way. I get to do what I love while also taking care of my family. It is the perfect balance for me.  Do you work from home? Is your space not living up to its potential? I'd like to share some simple ways to plan your dream space, hope this gives you some inspiration to dream big!

1. Address Your Existing Space

When I'm in clients homes, I walk through each space an address each room separately. We talk about the space in depth and get down to the nitty gritty discussing each detail. We talk about their likes and dislikes as well as the many nuances of the room. I want you to think about your home the same way. Spend time in each room and take a moment to ask yourself these key questions: What do I do in here? What do I love about the room? What isn't working for me? 

2. Get Design Inspiration

At a time like this, it’s nice to be online and have so much inspiration at our fingertips. Take some time to scroll through Pinterest and gather your favorite images. Categorize them by room and create boards that you gravitate towards. This will help to organize your thoughts into categories.

 In order to get a sense of my client's style, I ask them to put together Pinterest boards and share them with me. Pinterest is a great way to collaborate and exchange ideas with my clients. It’s also an easy way for clients to communicate their design ideas to me. Pull ideas from these boards when shopping for that new great sofa.

wheaton+Pinterest+design+inspiration+dream+home.png

 3. Define Your Aesthetic

Once you have your pinned photos, look at each photo and decide which elements of the photo you are gravitating towards. Tag the photo with this idea. For example, do you love the color palette in the photo? Or is it the type of furniture or window treatment that was used in the room? Are you digging the overall vibe? Make a list of your "likes" and tag each photo with your "must-haves". 

4. Identify Your Must-Haves

Almost there! Review your list for steps 1 & 3 and write down your "Must-Haves". They can be furniture items, accessories, features or functions (like great storage- who doesn't LOVE great storage!?). For example, I like to pin rooms with paint colors that I love. As many of you know, I have a top ten list of my favorite go-to grey and white paint colors. I also have a lighting category where I pin my favorite table lamps and chandeliers.

kitchen+inspiration+cambria+quartz+traditional+island+pendants.png

5. Describe Your Wants

Next, decide on the next layer of priorities. What do you really want but could probably live without if you had to? Remember, this list can include features of the room, it's desired function or items. Create a list of items that you will purchase in the next 3-6 months.

6. Make Your Wishlist

Welcome to the final layer - your wish list! Now, I want you to really dream big here. Take a few quiet moments and visualize what your dream home would look like. The possibilities are endless. Although, this list comes last when prioritizing, you never know, you may win the lottery! I know, I know, wishful thinking…


pendant+lighting+inspiration+geometric+over+waterfall+island+white-2.png

7. Take Action!

Interior design can be challenging, there's no doubt about that, so don't feel bad. The investment is significant, so there's no room for costly errors, right? But, without having a professional like me as a resource with your best interest in mind, you're forced to face this problem by yourself. Let me help you. Book a discovery call (phone calls are safe!) with me and let's make your design dreams a reality.

This too shall pass. I'm right here with you during this trying time. We are all doing our best to seek out the positive and make the most of the current situation. I tell you what, interior design is my passion, I love what I do and love helping make the world a more beautiful place. A little lying low for the next few weeks isn't going to stop me!

Again, reach out and setup a quick 15 minute discovery call. I want to get you a solid plan to move forward so you can have your home ready to go for summer!

See y'all soon!

Michelle

Michelle Ramaker
How to Prepare for Your Most Productive Interior Design Consultation
michelleramakerinteriors-hinsdale-prepare-for-interior-design-consultation-explore-style.png

Get excited! We are about to make your design dreams come true! I have an incredible team that can execute your design from start to finish. The design consultation takes you one step closer to making your design dreams come true and THAT is something to get EXCITED about!

My consultations provide value to my clients, save them money and help avoid frustration. Each consultation typically includes some or all of the following, depending on your individual project needs: two hours of intensive and custom ideas, getting to know your needs through questions and answers, a walk through of your home discussing each rooms function, the existing furniture pieces and new furniture recommendations. As well as guidance on color balance, layout, scale and appropriateness of items, suggestions on paint colors, estimated budget range for your project, and cabinetry, countertop, hardware & tile ideas.

The design consultation is a working appointment where I provide you with valuable information, tips, advice, resources, and a solid direction for your design project. Check out my top tips to make the most of our time together:

michelleramakerinteriors-wheaton-interior-design-strategy-consultation-open-spacious-family-room.jpg


1. Prepare Goals in Advance

Knowing your goals for the space is the most important first step in achieving your design dreams. It's best to discuss how much time, energy and money you think you'd like to invest into the project so that I can determine which design service would be best for you.

2. Come with a Budget

Gather all parties involved in the design project (spouse/partner, roommate, family, children, etc.) and have a conversation about your level of investment for this project BEFORE I arrive. If you don't know 100%, that's okay.

3. Look at Daily Habits with Fresh Eyes

Help me define the vision for your space by being conscious of your daily habits. Write down a list of activities you do during the day. This will help me better understand your needs for your home. There are so many daily things we overlook simply because they've faded to the background of life!


michelleramakerinteriors-hinsdale-prepare-for-interior-design-consultation-research-aesthetic-style.png

4. Prepare for Judgment-Free Transparency

Have you ever found yourself wondering...

"What if my interior designer thinks my house is ugly, beyond all hope?"

"What if my interior designer doesn't listen to what I want or stay within my budget?"

Put those fears to rest and move forward with confidence - because I'm about to bust some design myths: The current state of your home doesn't bother me. When we first meet, I'm more focused on you than on your current design! I can assure you that you'll get the best results from full transparency.

5. Have All Necessary Pieces Present

Color decisions are some of the most anxiety-producing dilemmas in any interior design project, which is why I like to face these situations head-on. My team is skilled and color-certified to help you make unregrettable choices for every wall, window treatment, ceiling, fabric, and flooring hue in your home. Color plays a huge role in how we feel, to the point where "color psychology" has become a legitimate field of study. In fact, it isn't merely the color itself that our brains interpret as mood-invoking, but also the shade, pattern and depth of that color. Collect paint swatches you're considering and we will review them at your consult as well as any furniture pieces or fabrics you would like to incorporate in the design.

michelleramakerinteriors+elmhurst+prepare+for+design+consultation+declutter+tile+samples+palette.jpg


6. Know Your Aesthetic Preferences

I create a design around you, not in spite of you. Interior design is as much about psychology and ergonomics as it is about creating beauty. And as we all know, everyone defines beauty differently. Have a rough idea of your aesthetic preferences before we meet and I will help you refine it at your consult! If you have Pinterest or Houzz ideabooks, have them ready as well.


michelleramakerinteriors-glenellyn-prepare-for-interior-design-consultation-know-goals.png

7. Establish a Decision-Making Process

How do I make my space both pretty and practical? It seems like it can be one or the other.

For me, I think first about what this room NEEDS to be able to do. If its a living room, it needs to house some toys for my kids, the sofa for my husband to lounge on, and it needs to be the place we gather with friends and family to either chat over cocktails or watch the big game on TV. That is now what I base everything around. So, I may knock out two birds with one stone and get storage cubes to put toys in when they're not being used, but they can also double as seating when we have our guests over. It's all about mixing and making things multi-use. But, when you do pull the trigger and buy something, don't spend your money if it doesn't fit the bill for both "pretty" and practical. Have a process for decision making in advance of our meeting. It's also helpful to have all decision makers present. Decisiveness is critical to an efficient strategy session!

Thank you for following along with my tips for how to best prepare for your design consultation. I am thrilled to help you achieve your design dreams and design the home that helps you live your life to the absolute fullest!

Haven't scheduled your design consultation yet? There's no time like the present! Reach out to me and I'd be delighted to help.

Cheers!

Michelle

Michelle Ramaker
How To Declutter Your Home With Purpose
declutter+entryway+open+shelving+minimal+accessories.jpg

When your home is filled with clutter it can feel like an overwhelming mess. Stacks of paper and tupperware on the kitchen countertop to kids toys about the Living Room. I get it. Tackling the mess is an ongoing struggle in my home. But, I assure you, a dramatic reorganization of your home will cause dramatic changes in your lifestyle and perspective. I mean it! Tidying up will change your way of thinking and your approach to life. When you put your house in order, you put your affairs and past in order, too. As a result, you can see clearly what you need in life and what you don't and what you should and should't do.  

Most people would prefer to live in a clean and tidy space. But many don't think its possible. Here are my top 7 tips and acquiring the right mind set for creating order and becoming a tidy person. I guarantee you will be surrounded only by things you love!


1. Start with one space

Tidying brings visible results. The ultimate secret to success is this: if you tidy up in one shot, rather than little by little, you can dramatically change your mindset. This approach is key. Choose one room at a time and organize and purge that one room. If you concentrate your efforts on eliminating clutter completely in one room within a short span of time, you'll see instant results that will empower you to keep your space in order.

michelleramakerinteriors+barrington+decluttering+shelves+closet+clothes.jpg


2. Give yourself a good window of time

The process of deciding what to keep and what to discard will go much more smoothly if you block off a few hours for each space and begin with items that are easier to make decisions about. The best sequence is this: clothes first, then books, papers, and mementos. Sticking to this sequence sharpens your sense of what items bring you joy. This will accelerate the speed of your decision making process.


3. Have boxes at the ready

Designate a place for each thing. This is the routine I follow every day when I return from work. First, I walk in my house and announce "I'm home!" then I take off the shoes I wore today and place them neatly on the shoe rack. Heading into the kitchen, I lay out dinner from the refrigerator place it on the countertop and go to my bedroom and take off my work clothes, hang them neatly and say "Good Job!". I select the clothes from my dresser I feel like wearing inside and get dressed. I did not give you this detailed report to boast about my beautiful lifestyle, but to demonstrate what its like to have a designated spot for everything. Keeping your space tidy becomes second nature. You can do it effortlessly, even when you come home tired from work, and this gives you more time to enjoy life.


4. Stay guilt-free and focused

When you come across something that's hard to discard, consider carefully why you have that specific item in the first place. When did you get it and what meaning did it have for you then? Reassess the role it plays in your life. If, for example, you were gifted clothes or accessories, but never wear them, examine them one at a time. What has each piece taught you about your current life? It has taught you what doesn't suit you, in fact it has already completed its purpose. Say "Thank you for giving me joy when you were gifted to me" and let it go!

decluttering+take+photos+of+memories+orange+shoes.jpg


5. Take photos for memories

Can you truthfully say that you treasure something buried so deeply in a closet or drawer that you have forgotten its existence? Let them go, with gratitude. Take a photo of any items that you no longer want in your space, but have sentimental value. You feel clear and refreshed when you're done.


6. Use attractive organizing products

We need to accurately grasp how much we actually own. And we fail to grasp how much we own because our storage methods are too complex. In order to avoid excess stock we must simplify storage. Utilize organization bins like canvas lined wicker baskets for visible areas. This will keep down the clutter and keep storage as simple as possible.

michelleramakerinteriors+glenellyn+declutter+family+room+sofa+end+table+book+floor+lamp+minimal+accessories.jpg


7. Establish rules against future clutter

I swear to you tidying can be done thoroughly and quickly, all in one go. The only tasks that you will need to continue for the rest of your life are those of choosing what to keep and what to discard and of caring for the things you decide to keep. 

You can put your house in order now, once and forever. Pour your time and passion into what brings you the most joy, your mission in life. Tidying up will change your way of thinking and your approach to life. When you put your house in order, you put your affairs and past in order. 

Need help refining the purpose, aesthetic, and functional layout of your space? I’m here for you. Shoot me an email and let’s get started!

Until next time,

Michelle

Michelle Ramaker
How Can I Support Your Best Living in 2020?
whetoninteriordesigner.png

Welcome to 2020! I absolutely love this time of year. It brings new beginnings, big dreams and a fresh start in our lives. What are your home goals for this year? I am so confident that I can help you start down the right path to design success. It's taken me years and years of experience and several mistakes to figure out everything about successful design. I'd love to help bring your dream home to life and work with you in a way that makes sense for you. It's time to thrive in your home this year!

Interior design can be challenging, there's no doubt about that, so don't feel bad. The investment is significant, so there's no room for costly errors, right? Without having a professional like me as a resource with your best interest in mind, you're forced to face this problem with the help of a "Designer" salesperson at furniture showrooms to do what? SELL you furniture. How can they possibly know what you want or what you need if they only met you for 5 minutes? Please don't fall for this trap this year.

napervilleinteriordesign.png

Interior design consultation

Most of my design services begin with an in home design consultation, where I take the time to get to know you, and your needs and your desires for the project. The design consultation lasts up to two hours. This is a working appointment where I provide you with valuable information, tips, advice, resources, and a solid direction for your design project.

My design consultations provide value to my clients, save them money and help avoid frustration. Get ready to dive right into the new year with a solid direction for your home!

Simple DIY design

My simple DIY design package provides a conceptual design for you to use as a “recipe” to pull together a beautiful and cohesive space on your own. This package allows you to enter into a “light” version of my exclusive full service design, providing you with the core foundational elements necessary to create that dream look you’re after. Approach your 2020 DIY projects with confidence with the help of me!

wheatonbathroomdesigner.jpg

Luxury DIY design

My Luxury DIY Design Package will provide you with every detail you need to achieve the same level of magazine-worthy design that you see in my portfolio. In fact, unlike my Basic DIY Design Package, you will enter into the very same unique and exclusive Full-Service package my clients receive, however the difference is you will have the intention of executing the furniture purchasing, installation, project management and styling on your own.

This approachable Luxury DIY Design Package combines luxury interior design and DIY in a way that’s never been done before! If you are busy in the new year and the thought of designing a space from scratch stresses you out, I'm here for you!

glenellyninteriordesign.png

My Passion

You have come to a point in your life where you desire a beautiful home. You want a high level of service and want to be exposed to products that are unusual and unique. My 2020 goal is to create soothing, enveloping and warm environments – homes that feel like home. Low maintenance and easy to live in is what I am all about. Do you fear the final outcome may not turn out the way you want? Are you worried you may be over your intended budget? I get it. I am here to eliminate these fears and help you succeed this year, whatever your home goals might be!

Not ready to call me in for support? My mailing list is second best! Get free advice and tips throughout the month. It's on the house. ;)

~Michelle

Michelle Ramaker
7 Ways to Make Your Home Extra Cozy This Season

7 Ways to Make Your Home Extra Cozy This Season


Our homes reflect us, and that makes them come alive during the holiday season! Savor the process of decorating for the holidays. Like home itself, it can be full of joy.

michelleramakerinteriors-wheaton-cozy-home-candles-books-windowsill.jpg


The truth is, most of us could use a little help. Most of us, faced with our own houses, aren't sure where to start decorating for the holiday season. This blog post is full of starting places - 7 of them, in bite sized tips, techniques and pointers. Every idea works with your current decor, designer-tested, and able to harmonize, not clash, with your home.


7. Turn Up the Texture

The most luxurious piece of furniture in the Family Room is not necessarily the sofa. Its often cozy toss pillows and chunky blankets that make the room an inviting place to lean back, put up your feet, and read.


woman-carrying-blankets-sweaters-pink-navy-cream.jpg

6. Rugs to Sink Your Toes Into

In choosing colors for your holiday decor, I like to use a rug as a starting point. If you are fortunate enough to swap out a spring/summer rugs for fall/winter rugs, layer them over wall to wall carpeting for a cozy vibe. To make the room as rich and intense as the rug, bring in deeper hues in your holiday decor that are more prominent in pattern. 

5. Window Treatments to Keep You Warm

Most people think purely about looks when they address a window. What will be prettier; curtains, shades or roman shades? What color? What fabric? What print? Truthfully, the first question should usually be: What do I want this particular window treatment to accomplish? Your answer, which may vary from room to room, could include partial privacy, total privacy, filtering sunlight, framing a good window or turning the window into a focal point. Maybe you want the holiday table to shine in your Dining Room with natural light, but you also want partial privacy from the house next door. Sheer curtains are a natural solution; they allow sunlight while veiling the neighbors' view of your holiday celebration.

home-decor-fireplace-mantle-spruce-pine-lights.jpg

4. A Fireplace Mantel to Smile About

That huge open space over the fireplace can be daunting to fill, especially when you consider the cost of a massive mirror. Here's a solution for the holiday season: cozy up your mantel! Objects on a mantel should be of varying heights, you want a skyline, not all the same level. Raise a few small objects, such as framed photos or candles, above their neighbors by creating pedestals that become part of your holiday display; a stack of three bound books, a collection of candlesticks add fresh garland to top it off!


3. Your Favorite Scents of the Season

If your Dining Room centerpiece consists of two candlesticks flanking a flower arrangement, its time to drag it out of the 1950s. Try grouping a large cluster of candlesticks in the center of the table. You can never go wrong with white, cream colored tapers that fill your home with the scent of the season.


2. Fall Foliage at Home

Fresh greenery and flowers add a touch of season to your home. Arrange large bouquets or branches in a silver-plated champagne bucket. Buy sprays of greenery that will go with everything - eucalyptus, box or anything that strikes you and add a few long-stemmed roses for color. This will keep your costs down but still add warmth to your holiday decor!


michelleramakerinteriors-wheaton-cozy-home-decor-winter-flowers-pink-candle-tea-biscuits.jpg

1. A Place to Gather Loved Ones Close

Reclaim your fireplace! Consider pulling two armchairs or wing chairs up to the hearth. Place a round table between them, a great spot for hot cocoa! The fireplace now becomes an anchor for gathering, ideal for two (remember to light the fire!).

Choose a handful of ideas from this post that appeal to your sense of comfort, your eye for design, your budget and your home for the holidays. They will work together, because your taste and your personality will bring the holiday spirit in every decorating decision you make. Don't feel like you can go it alone? Most people don't know it, but you can hire me for just a few hours, either to get some advice or to have your home "re-styled." Schedule a Discovery Call and we'll get to work on creating gorgeous holiday decor in your home!

Cheers!

~Michelle

Michelle Ramaker
It's Almost Time to Deck the Halls

It’s officially ‘cozying up by the fire’ season over here, and while I’m still waiting a few weeks to decorate our holiday mantle, I’m finding inspiration in beautiful, inviting family rooms at the moment.

Photo: Lowell Custom Homes

Photo: Lowell Custom Homes

Family Room Refresh

The holidays are crazy, but updating your Family Room doesn’t have to be. Build on your sofa and coffee-table basics with pillows, throws and accessories that go with your favorite flow.

Put it in neutral! When you buys big ticket items - sofa, coffee table, rug - in gray, beige or cream, its easy to change all the other decorative elements when you want to bring in bright pops of color or different textures.

chicago interior designer

True Luxury

A truly comfortable family room means never having to get up for the things you need. Test your home’s luxury: pour yourself a glass of wine and sit down in every seat. Is there a convenient spot where you can set the drink down? If not, you need an end table. Can you reach a reading light? If not, you probably need some sconces or lamps. Sit in your own favorite reading chair. What happens when you phone rings? If it involves getting up, have an electrician install an outlet for you to keep your phone or tablet fully charged and ready to go.

reclaim the fireplace

Most people who are fortunate enough to have fireplace tend to build their main seating arrangement around it- sofa, coffee table, chairs. But if you don’t entertain all that often, consider a more intimate alternative: pull two armchairs or wing chairs up to the hearth instead. Place a round table between them, a great spot for a drink. The fireplace now becomes an anchor for a deeply personal spot, ideal for two (remember to light the fire).

If you buy a new sofa or loveseat, don’t keep their accompanying throw pillows. They’re too small and too neatly matched to the upholstery. This combo can rob a room of individuality. Instead, have your own, more gracious pillows made. Pro Tip: when shopping for pillow fabric, bring the cover of an old sofa pillow with you to ensure that the patterns and colors are complementary.

If you find yourself unable to make a single decorating decision, it maybe time to hire a designer for some short-term help. A good designer knows how to draw up a budget, what to invest in, went to take short cuts, how to avoid mistakes, how to work expertly with color, form and proportion and how to incorporate your taste throughout. Don’t feel like you can do it alone? Email me and we’ll get to work on creating gorgeous spaces in YOUR home!

Michelle Ramaker
What is it really like to work with an Interior Designer?

At some point, you may want expert guidance - maybe when you put five test swatches of grey paint on the wall and you can't choose between them, or when your great room seems stuffy no matter where you put the sofa. If that time comes, there are several ways, all fairly affordable, to pick the brains of an interior designer.

You can get professional advice about paint and wallpaper, furniture arrangement, lighting, whether to buy a new sofa or reupholster the old one, or where to squeeze in a home office. Just about any specific question you can think of!

Photo: Studio McGee

Photo: Studio McGee

FIVE WAYS TO TALK TO AN INTERIOR DESIGNER

1. Know what you like and what you dislike. Gather photos online and put them into LOVE and HATE files. They're like shorthand to a designer - an instant handle on your taste. 

2. Before you meet, ask what the designer charges, and be upfront about what you want to spend. You might say, I can afford five hours of your time at this stage, and I have questions about color and furniture. Find out what you can get done in that amount of time.


Photo: Em Habitat

Photo: Em Habitat

3. Have three or four specific questions ready before you meet with the designer, and write them down in order of priority. That way, if you only get through half the list, it will be the important half. 

4. Assume that the first meeting will be held at your home, which the designer needs to see. You're not likely to be asked to meet her at their office.

5. If your relationship is going to last longer than a few hours, ask for a contract or letter of agreement that spells out the job and the fees. As with any contract, read before you sign. 

Photo: Patterson  Custom Homes

Photo: Patterson  Custom Homes

Design is a creative field, so no two designers will solve a problem the same way. In fact, it's amazing how much they can differ.

Ultimately, expert advice, whether you listen to it or not, tends to be a pretty good investment.

~Michelle 

Michelle Ramaker
Trend Watch: Modern Rustic

New Year's wish list: adding modern rustic elements and bringing the outdoors in. Are these on anyone else's list? Hi there! I'm Michelle, and today I thought I'd keep it real and give you a peek into the 2018 trends starting with a news flash: faux rustic is no longer in. So skip the galvanized tin letters on your Living Room wall and go for something more authentic. 

Today, I'm talking about natural, raw, and rustic elements. I'm always a fan of making things feel as natural as possible, so this is a trend I can get behind! I love using stone, wood, and other rustic elements in a space. They bring so much texture and warmth. The neutral color palette these elements have makes it a perfect backdrop for decorating. 

Photo: House Beautiful

Photo: House Beautiful

Photo: Jen Worts

Photo: Jen Worts

Photo: Coats Home

Photo: Coats Home

If you're not ready to dive into this trend just yet, try a piece of rustic furniture or lighting! I LOVE seeing a vanity, coffee table or large rustic light. The possibilitie are endless!

Photo: Jen Worts

Photo: Jen Worts

jen worts.jpg
Photo: Traditional Home

Photo: Traditional Home

Michelle Ramaker
Before + After // Farewell 90's

Hey hey hey! It's BEFORE + AFTER time! This house has been my EVERYTHING for the past year and I'm so thrilled for it's debut. I can't say enough great things about this family. Besides being super cool and cute as ever, they were very direct and clear in their vision for their home. Make it feel calm, cozy, functional, and family friendly...and help us with this awful 90's kitchen! So before I get all crazy with excitement... are you ready for my BEST BEFORE + AFTER?! 

KITCHEN + FAMILY ROOM // BEFORE + AFTER


Make Your Home Look Like a Model Home

There are some tips that you can use now to make your home look like a model home. I am serious! It isn’t as hard as you might think.

Here's how you can take your home from drab to fab. It's so worth the time and effort to give your home new life.

1. Float your furniture. Move your furniture away from the walls. More often than not, you will make your room look more inviting and more accessible.

2. Get more lighting. One thing that sets model homes apart from everyone else’s homes is the lighting. Use dimmers, use lamps, and track lighting. Layering the different types of light in the room is key. The rule of thumb is 100 watts per 50 square feet.

3. Find your inspiration. This is how many designers start out their designs for model homes using one object. It may be a swatch of fabric or a piece of art or even a piece of pottery. Use that item to find your color and design scheme.

4. Paint. A lot of model homes really rev up their spaces with just paint. They have painted something special on the walls almost using the painted wall as art. Other times, they will paint an accent wall. Two words of caution on accent walls. First, make sure the accent wall contrasts enough with your main wall color. Second, make sure you pick the right wall to be the accent wall, don’t pick some sliver of a wall or a wall that is to the side of the room away from the focal point of the room.

5. Plants. Many model homes have plants in the home. Plants bring the outdoors in!

6. Bookshelves. Lots of model home have a library area filled with books that look fabulous. We all know that books are expensive to use only as a prop. You know what they do? They visit thrift stores and by books based upon the color of the cover. Never leave the paper sleeve on it.

7. Choose fabulous tile. Most of the model homes look like they have really upscale kitchens. If you look at the details, most of the money is spent in the backsplash tiles. They find fabulous tiles to put up and it adds a classy and upscale touch to the kitchen. 

8. Window Treatments. Drapes can be hugely expensive. They don’t have to be. In most model homes, they only add drapery panels on either side of the window. They do not cover the entire window, but simply frame it.

9. Candles. This is a standard in most model homes, especially in bathrooms. Get pillar candles and make sure to light the wick. It’s the small touches that make your home look lived in and not just trying to look like a generic home. 

Let's discuss ways to make your home fab! Drop me a line at michelle@ramakerinteriors.com and lets get started.

Michelle Ramaker
How To Place Furniture In Your Home

Space Planning is one of those tricky areas to design that some people struggle with.

Many people aren’t sure there are rules to follow in regards to placing furniture in a space and also so that it makes sense.

FIRST YOU NEED TO ESTABLISH A CENTER OF INTEREST...OR WHAT YOU HEAR A LOT AS THE FOCAL POINT.

First, you need to establish a center of interest... or what you hear a lot as the focal point. This can be the fireplace, a view out your window, a large piece of art. Whatever is the star of the show is in your room.

Your next thing to do is to figure out the flow of traffic into and through the room. Sketch up your room and make note which paths people typical take in your room. Do they cross through the room to go outside or to a bedroom? These obvious paths of travel will make it easier for you to figure out where to place furniture.

When you have figured out where you can fit your furniture in without placing an obstacle in the traffic path, your next goal will be to use scale and balance. You will balance the pieces of furniture in your room so not all the heavy pieces are on one side or grouped together. You want to balance heavy pieces with lighter pieces. You also don’t want to have a very large couch paired with a dinky side table or coffee table. Consider the sizes of the pieces and how they look next to each other.

IF YOU HAVE A LARGER ROOM WHERE IT CAN HAVE MORE THAN ONE PURPOSE, YOU SHOULD ARRANGE YOUR FURNITURE IN WAYS THAT THE AREAS OF THE ROOM ARE DEFINED.

You can have a conversation, a game, dining and reading area in separate and undisturbed areas.

Cutting out paper pieces to represent furniture and placing it on top of graph paper can be really helpful and a lot easier than lugging the actual furniture around the room till you find the best solution. Sketch the outlines of your room on the graph paper, including where the doors, windows, fireplaces, electrical outlets, etc. are. (TIP: When using graph paper, each square (1/4” square) is one foot/12 inches.) Then you make paper patterns of the furniture. Write the sizes of your furniture pieces on each piece of paper so you know what piece you are moving around.

Remember, there is a solution for every room that may not be evident right away, but if you continue to work for the solution, you’ll get it! Good Luck!

If you’re having a hard time with your space and you’re ready to take strategic action to create a one of a kind room, let’s talk! Drop me a line at michelle@ramakerinteriors.com

~Michelle

Michelle Ramaker
You Don't Have to Be a HGTV Star to Have a Fabulous Home

Home interior design shows are very popular today. With a whole channel devoted to the subject, you would like to think that the TV Interior Design Gods can do no wrong.

I’m really sorry to break the news to you. They aren’t always Gods to Interior Design and half the time they aren’t real designers. Shocker!

Drapery. Make sure you buy at least two times the width of the window. Two panels on a window is not going to cut it unless your window is very narrow. You want your drapery to look full, not like some sad teenage prom dress.

Walls. They have a knack for applying weird things to the walls or bad faux finishing. Oh, and be careful when you faux finish a wall. You really don’t want your family and friends making fun of you a year from now for sponge painting your wall in mauve and saying “The 80s called and want their walls back!”

Lighting. Don’t under light your space and make sure you layer the light. What I mean by that is, use different types of lighting, overhead, table lamps, floor lamps, task lighting and the so on. The rule of thumb is 100 watts per 50 square feet.

Flooring. Make sure you pick the right flooring for your space. You have to remember what the purpose of your room is first. Don’t have polished concrete floors in a kid’s room and don’t put some porous stone in your wet areas like a kitchen or bathroom.

Furniture. Building useless furniture is a common problem the TV Designers have. With their self imposed budget, they instantly think that they should make something out of MDF or plywood. You know, just like all that quality furniture you wish you could buy, but had enough sense to pass on.

Space. Oh, this is one of their sins they can’t stop. The just will not repent or give up on trying to stick too many pieces of furniture into one space. “Here is our living room and now you have two sofas, two chairs, three tables, 4 floor lamps and a partridge in a pear tree.” Yikes, people we need space. If you feel like you are in a movie theater and you’re crawling over people to move around, you got too much stuff. Edit it!

Slip covers. They love to slip cover junk. If it is a piece of junk, get rid of it. If your couch is old, not well built and you don’t really like it now, what makes the TV Designer think you will fall in love with it all over again because it looks like a elephant covered in a sheet?

The moral of my story is if you want to watch these design shows, remember these two things. TV Designers aren’t always good and do you think they would really put that decoupaged sofa in their house? 

Cheers!

~Michelle

Michelle Ramaker
5 KITCHEN DESIGN TRENDS YOU SHOULD DEFINITELY EMBRACE

THE KITCHEN IS THE HEART OF THE HOME AND A SPACE WHERE WE COOK AND ENJOY SNACKING WHILE CHATTING WITH FRIENDS AND FAMILY.

The Kitchen is the most valuable room in the home. It is the space I spend the most of my time with clients discussing and designing. Ideally, your Kitchen renovation should earn a 70% return on investment when you sell your home. But, this depends on the features you choose.

HERE'S HOW I CAN HELP. LET'S CHAT ABOUT THE TOP 5 KITCHEN TRENDS FOR 2017 THAT YOU SHOULD DEFINITELY EMBRACE. 

1. MORE TECHNOLOGY

Technology is rapidly developing in the modern home and is taking center stage in your kitchen. 2017 will focus on appliances with integrated speakers with bluetooth functionality, color changing lights and pop up sockets for phone charging giving kitchens a modern twist. 

2. MONOCHROME TONES

I'm anticipating a rise in popularity of grey, black and white tones in the kitchen. Last year brought us a huge uptick in the use of grey. But, these three colors can work in varying degrees; whether its entire cabinets, surfaces, appliances or kitchen accessories - hello onyx black Kitchen Aid blender for a mere $699. 

3. QUALITY STORAGE SOLUTIONS

This is an ongoing struggle for my clients across the board. I prefer to hide all small appliances (toaster oven, coffee pots) in tall pantry cabinets with roll-out drawers. My favorite additional is deep drawers with smart dividers to keep everything organized and create that wow factor.

4. CLUTTER FREE COUNTERTOPS

My go to design trick to open up a small Kitchen and allow the cook to calmly prepare their food is adding a large, clear open surface.

5. MODERN PAINTED CABINETS

When it comes to a painted kitchen, the trend is moving away from chunky crown profiles and heavy door moldings. I'm designing a slimmer, thinner look with Shaker style doors and slab drawers. This helps the kitchen maintain classic proportions with a modern look & feel. 

Keep up to date with my inspiring ideas, latest looks and expert advice by signing up for your free workbook here.

Cheers!

Michelle

HOW IT STARTED

Welcome to "Behind the Scenes" where I pull back the curtain on my career, life and love of design. I've spent my entire life being impacted by interiors, from hotels, to restaurants, to traveling. I've always been inspired by the beauty around me, especially in nature. 

From a young age, I was always creative.I took an interest in residential design spending weekends at open houses with my parents. We would go from house to house taking in the interesting interiors and daydreaming about what it would be like to live there.  From then on, I believed that the power of an interior is a reflection of your soul and the souls who lived in those houses. 

THE NEXT STEPS

I decided I had to go to school for Interior Design and enjoyed it so much I graduated with honors. I loved learning and problem solving but was eager to start out on my own. Throughout the years I have had the chance to work in and with the best of the best Interior Architectural firms and builders throughout Chicago. 

WHEN YOU LOVE WHAT YOU DO, THE SUCCESS COMES

I quickly began to realize that designing came easy to me because I decided to always design homes on my own terms. I began to reach clients outside of the firms and quickly realized others were obsessed with my design style as much as I was. It was then I decided to create something very unique to who I am, and Michelle Ramaker Interiors was born. 

To this day, I attribute that individuality to my success as an interior designer. Through my design work I have cultivated a unique process that changes lives and allows people to love their homes wholeheartedly. 

Let me help you design the home you have always dreamed of. 

Reach out to me and we will begin with a clear vision. 

I'd Love to hear from you

Cheers!

~Michelle

Michelle Ramaker
De-Clutter in Ten Minutes or Less

When your home is filled with clutter it can feel like an overwhelming mess. Stacks of paper and Tupperware on the Kitchen counter to kids toys about the Living Room. I get it. Tackling the mess is an ongoing struggle in my home.

Let’s discuss the struggle.

First things first, can we start with just 10 minutes? Baby steps are important here. Can you dedicate 10 minutes of your day to this task? I know you can, let’s do this together!

Take another 10 minutes tomorrow, and the next day, by the end of the week you might have a whole room organized. You’ll be well on your way to a zen lifestyle before you know it!

Let’s start in the Kitchen.

Clear off your counter. Your goal is to have as many clear flat spaces in your home as possible. Let’s remove all the paperwork, kids’ artwork, shopping bags, and laptops from the counter. Sure, you can keep your favorite appliance. Do you need the blender for your favorite after workout smoothie? Put it in the cabinet or pantry, somewhere close and easy to get. All other paperwork goes!

Honestly, I’m passionate about de-cluttering and would love to live a minimalist lifestyle.

I can’t help it! If you share my need to have an uncluttered home and don’t know where to start, reach out to me at michelle@ramakerinteriors.com and we can get this de-clutter party started.